
Setting the screen resolution is complex on eComStation because you must reboot to see the new screen resolution. If the wrong screen resolution parameters are chosen, the computer may have no display, which can make accessing and correcting the screen resolution settings more difficult.
To make it easier to recover from a bad choice, activate the recovery choices menu before setting the screen resolution. To activate the recovery choices menu, open the Desktop properties. To open the Desktop properties, right click on an unused part of the desktop and select Properties.
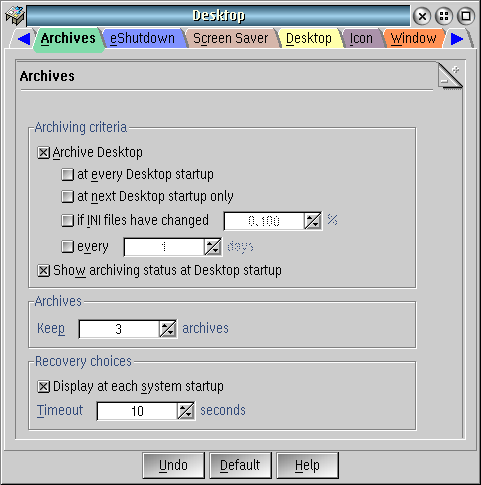
Select the Archives tab, and find the Recovery choices at the bottom of the dialog. Check the box for the Recovery choices menu, and pick the number of seconds to display the menu.
To set the screen resolution, open the Screen applet, which is located on the Desktop -> Local System Folder -> Setup Folder -> Screen. The first screenshot shows the Screen applet for the Panorama video driver.
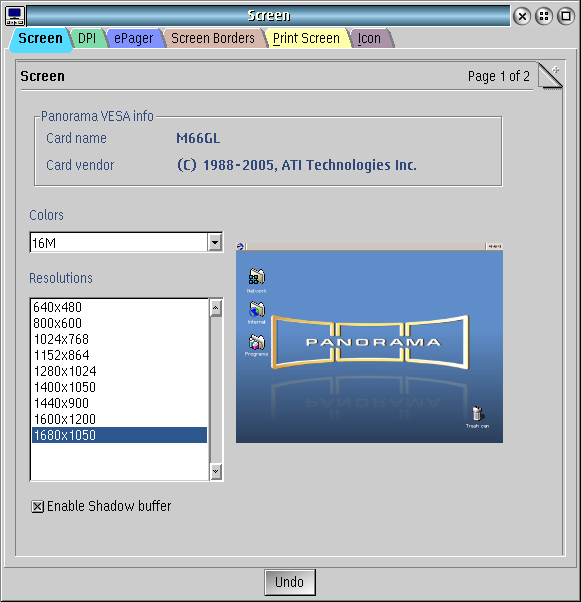
Select the desired resolution from the list of available resolutions. Close the Screen applet. Reboot the computer to see the new resolution. If the new resolution looks good, go back to the Desktop properties and uncheck the recovery choices menu. Congratulations, the screen resolution has been set.
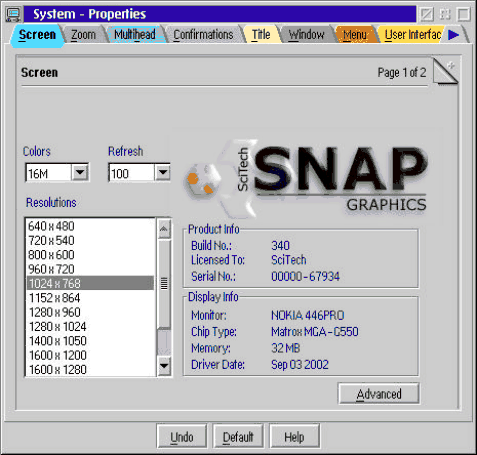
For the SNAP Graphics video driver, selecting the resolution is very similar. The first page of the Screen dialog is similar to the one for the Panorama driver.
The important difference is in setting the horizontal refresh frequency to match the best display on the monitor. Unlike setting the screen resolution, horizontal refresh frequency is change immediately, and reverts in 15 seconds if you don't press OK.
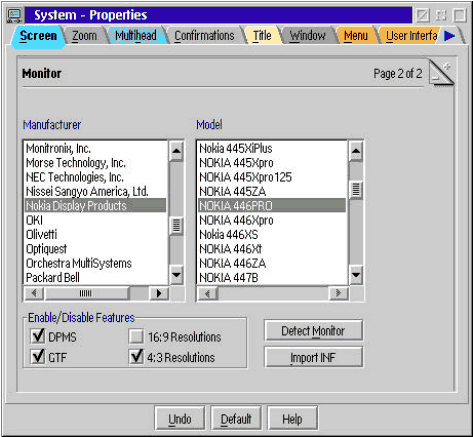
On the second page of the SNAP graphics video driver there are selections for the wide screen resolutions, which are called 16:9 resolutions. Make sure this box is checked to activate the wide screen resolutions.
If the screen looks bad, but you can reach the screen applet, then you can choose another screen resolution to see if that is better. If the display is unusable, then the machine should be rebooted and the fix can be done on the recovery choices menu.
                                RECOVERY CHOICES

   Select the system configuration file to be used, or enter the option
   corresponding to the archive desired.

   ESC - Continue the boot process using \CONFIG.SYS without changes
   F2  - Go to command line, (no files replaced, use original CONFIG.SYS)
   F3  - Reset primary video to classic VGA
   F4  - Go to Maintenance Desktop (VGA resolution, non destructive)
   F5  - Enable full hardware detection
   F6  - Disable hardware detection

   Choosing an archive from the list below replaces your current CONFIG.SYS,
   Desktop directory, and INI files with older versions.  These older versions
   might be different from your current files.  Your current files are saved in
   \OS2\ARCHIVES\CURRENT.

   1) Archive created 11/24/2012  9:10:34pm
   2) Archive created 10/10/2012  12:45:40pm
   3) Archive created 10/9/2012  7:51:08pm
   0) Original archive from INSTALL created 10/9/2012  6:56:24pm

   D - Reset GRADD based video driver to 800 x 600 64K colours.
There are a lot of things you can do from this menu, but the simplest is to use option D to reset the video to 800 x 600. This should display on nearly all systems.
If you can reach the command line from the Recovery Choices menu, then you can run any command line program. One program that can be useful if you have the Panorama video driver is PanoUtil. The command line help for PanoUtil is shown below.
PanoUtil 11-Dec-2012 Written by David Azarewicz
For use only when a compatible Panorama is installed
Usage:
  PanoUtil [switches] function
  Switches:
    -v : verbose
  Functions:
    -i : display adapter information
    -q : query current MTRR settings
    -p [d:] : Reset PM resolution to 800x600 on drive d:
    -r [d:] : Reset custom resolution to default on drive d:
    -d 0|1 [d:] : Enable/Disable custom resolution logic on drive d:
    -c X Y [d:] : Set Custom resolution to X Y on drive d:
    -e 0|Clk,H,V,Hbl,Vbl,Hof,Hw,Vof,Vw [d:] : Set custom EDID on drive d:
    -s [d:] : Show custom resolution status on drive d:
    -m    : Modify specific MTRR
       base is in hex
       size is in decimal and must have a k or m suffix
       flag is 0 for disable, 1 for enable
       example: PanoUtil -m d0000000 64m 1
For example, I am able to work with Tobopeep by running PanoUtil and creating a mode for a 1920 x 1200 x 24 bit display. The computer would otherwise be limited to 4:3 display modes.